

Field note 01
Unlock the battery before planning the attack
The Iron Viper Battery requires Headquarters level 4 and the claimed Break the blockade reward. This is the earlier campaign victory: finishing it without collecting the reward does not grant clearance. Open Missions and claim completed Frontier orders in sequence. Then find the battery in World Map → Boss Campaign. You can inspect and scout a boss before you qualify to attack it; the attack panel explains any remaining requirement.
Field note 02
Get exact intelligence, not a guess
Iron Viper is a level 3 NPC encounter. Exact intelligence requires recon score 3: your Radar Station level plus Early Warning research level. Improve either until their sum meets that requirement, then send a new scout. Upgrades do not rewrite an older report. One troop is enough for a scouting order; the order displays its material cost and travel time. Scouting causes no battle and brings no loot. Read the new report before preparing the attack.
Iron Viper recon requirement: 3. Radar Station level + Early Warning research level. Upgrade first, then scout again. The attack unlocks at HQ 4, after the preceding reward is claimed.
Field note 03
Build around Infantry, then read the whole formation
The public boss dossier describes an artillery-heavy force with an infantry screen. Infantry counters the guns, making an infantry-led formation the sensible starting point. That does not mean every Infantry army wins: the defenders, your bonuses and the selected battle order still matter. Use the numerical forecast after exact scouting to compare commitments. Look at expected losses as well as victory chances. Avoid adding armor simply because it is more expensive; enemy artillery is a threat to armor.

Infantry
Holds the line. Counters artillery.

Armor
Pressures the enemy's infantry.
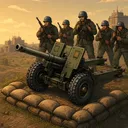
Artillery
Targets armor. Needs a screen.
Field note 04
Keep the next march affordable
Choose troops within your HQ-based deployment limit and check the active defenders left at home. Marching troops cannot defend your base. Review permanent casualty ranges and the materials needed to replace them; a forecast is conditional on the scouting snapshot and can change before arrival. Select a battle order deliberately. If the losses are beyond what your base can replace, keep developing research, training and production instead of forcing the encounter. Boss progression has no daily deadline.
Before dispatch: check possible permanent casualties, replacement costs and the active defenders left home. A forecast is an estimate from a scouting snapshot.
Field note 05
Read the report and wait for the return
The outward journey, battle and return are separate stages. A victory report does not mean the surviving troops are already back in the garrison. Carried materials are delivered on return, subject to the game's storage rules. The battle report shows the outcome and losses; use it to plan replacements. A PvE boss attack preserves your shield, but that protection still has its own expiry time. Check it before leaving your base lightly defended.
Field note 06
Claim the bounty and open the next supply route
After your first victory, claim Silence Iron Viper in Missions. Its bounty is awarded once and unlocks the next boss, Steel Jackal, alongside that boss's HQ requirement. Claiming the milestone also improves the minimum output of resource fields for future supply convoys; carrying capacity, duration and storage still limit what returns. Your own boss site rebuilds for six hours after a victory. Another commander's victory does not block your encounter, and repeat wins do not repeat the first-victory bounty.

Next encounter / HQ 6
Steel Jackal changes the question.
An armored column calls for artillery support. Claim Iron Viper's bounty, then scout and plan a new formation.
Before you enlist
A few things to know.
How many troops do I need to defeat Iron Viper?
There is no guaranteed troop count. Scout the actual battery, get exact intelligence, then compare infantry-led formations in the battle forecast. Your research, officers, battle order and the defenders change the outcome. Review possible casualties and replacement costs before dispatching.
Why is Iron Viper still locked at HQ 4?
HQ 4 is one requirement. You must also claim the preceding Break the blockade campaign reward in Missions. A completed but unclaimed reward does not grant clearance for the boss attack.
Does attacking Iron Viper remove my shield?
No. Boss encounters are PvE and preserve your base shield. An offensive PvP march removes your shield immediately; that is a separate order.
Keep your plan moving
Read your next field note.
Build the Infantry foundation
Start with Infantry, scout a level 1 camp and compare the battle forecast. A beginner army guide to training, counters, home defense and permanent casualties.
Open guideScouting, formations and battle orders
Learn army counters, scouting, casualties, march timing, defensive towers and PvP protection rules in Frontline Empire.
Open guideUse the unlocked supply route
Frontline Empire supply convoys: plan cargo capacity, extraction and return travel. Learn when resources arrive, how storage works and what recall costs.
Open guideA first boss worth preparing for.
Build your foothold, follow the Frontier orders and scout before you commit.