

A free simulation using the game's combat rules. No real troops, rewards or costs; research, officers and towers are set to zero. Your side presses on without withdrawing.

30 Infantry · beats artillery, loses to armor
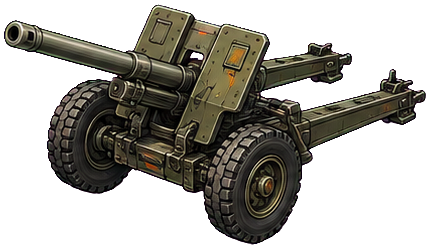
6 Artillery · opening fire against armor; vulnerable to foot troops
Every formation costs about 60 deployment points. Infantry shields guns, armor breaks infantry, artillery fires first. Compare the pure formations with combined arms.
Battle orders: roles and rounds
An ordinary Battle order lasts up to 8 rounds. Round 1 is ranged fire: only Artillery, Mortar Teams and towers shoot. From round 2 every unit fires. Infantry, Rifle Squads, Anti-Tank Teams and Combat Engineers hold the line and screen what stands behind it. Armor (Scout Cars, Tanks, Armored Transports and Assault Guns) breaks infantry. Artillery and Mortar Teams fire first and pick what they counter, but are exposed once your line falls. Anti-Tank Teams hit armor, Combat Engineers and Assault Guns break towers, and Field Medics bring back part of your fallen foot troops after the battle. Lead in person uses a tactical field instead: movement, terrain and your orders decide the fight.
Choose a job for each unit
Infantry provides a cheap screen; Rifle Squads add assault fire against the enemy line and exposed guns. Anti-Tank Teams and Artillery counter armor; Mortars counter the enemy line. Tanks punish ordinary infantry but are vulnerable to those anti-armor counters. Combat Engineers hold the line, attack towers and repair a surviving defending tower; Assault Guns trade speed for siege damage. Scout Cars are the fastest scouts and light carriers. Armored Transports carry the most cargo per army point. Gun protection scales with the surviving fighting line: full cover needs 2 times the guns' toughness in line troops. Medics and vehicles do not provide this cover. Inspect Matchups & support in Military and compare the actual forecast before committing.
When to bring medics
Each surviving Field Medic saves up to 2 fallen foot troops after combat, up to 25% of eligible casualties. Infantry, Elite Infantry, Rifle Squads, Engineers, AT Teams and Mortars qualify; vehicles and medics do not. Recovery uses whole units, so fewer than four eligible casualties means none can be saved after an ordinary Battle order. In a field battle, medics can also heal nearby troops during the fight; whole foot troops saved by healing count toward the same recovery allowance. Post-battle recovery does not change a defeat into victory. Use a small detachment with an infantry force that can already win. Battle-order forecasts show typical recoveries; reports show actual saved units, already deducted from permanent losses.
HQ, deployment points and reserves
Your primary HQ is your progression level. Power measures everything you own, including troops away from home. Each march and your active home garrison have an HQ-based deployment limit: Infantry costs 2 points; Rifle Squads, Scout Cars, Combat Engineers, Anti-Tank Teams and Field Medics 3; Mortar Teams 4; Armored Transports 5; Tanks 6; Assault Guns 9; Artillery 10. Extra troops remain in reserve and take no defense losses under the new rules. Choose your garrison at HQ; check the active defenders left home before dispatching. VIP and officers do not raise these limits. Normal camps can be attacked up to your HQ level at HQ 1–3, one level above at HQ 4 and two levels above from HQ 5. Easier camps remain available for orders; scout stronger targets and compare the forecast before attacking. Bosses and veteran fields have their own campaign gates.
Battle order, defense stance and luck
For ordinary Battle orders, Press on never withdraws. Standard withdraws after 40% losses and Cautious after 25%, but only while the enemy is holding up better; you can change the order until arrival. Defenders choose a stance: Hold fights at full strength and fires on retreating attackers, Dig in takes 25% less damage but deals 15% less, and Evade pulls a losing garrison back after 40% losses. Research and officers add bonuses, and damage varies by up to 10%. A tower must be silenced to win before time runs out. After round 8, the side that kept more of its toughness, tower included, holds; a tie is a successful defense. Field battles use explicit retreat orders and their own victory conditions, shown in the field battle rules.
A forecast is conditional
Battle-order forecasts simulate ordinary combat with your troops, bonuses and order against the scouted defenders. The target can change before arrival. For rival bases the forecast shows a range: scouts see troops and towers, but not research, officers or defense stance. Lead in person shows reconnaissance without win or casualty estimates: an ordinary battle forecast cannot predict your field positioning and orders. Permanent troop losses remain possible in either mode.
Develop reconnaissance with the campaign
Your recon score is your Radar Station level plus your Early Warning research level. After scouting, level 1–2 NPC camps reveal exact defenders without Radar upgrades. Other NPCs need a score equal to their level, up to a maximum requirement of 10: Iron Viper needs 3, Steel Jackal 5, Black Citadel 8, and all later bosses need 10. Rival bases always require score 10 for exact intelligence. Below the requirement, reports reveal only partial information. Upgrade your reconnaissance and send a new scout; older reports retain the information recorded at the time.
Casualties and loot
Both sides may lose troops. The winner usually suffers fewer losses; the loser can lose most of its force against a much stronger army. Even a one-unit detachment can be lost. The forecast shows a range of possible losses, not a guaranteed result. Camps, patrols and bosses hand over all their loot; player bases only what the survivors can carry. Battle loot can fill storage to 150% of its cap. Four victories over NPC sites pay loot per UTC day; bosses and veteran fields pay half again as much as a camp of their level. From HQ 4, sites at the recommended ordinary tier (usually HQ minus one) or above pay their full materials: one level weaker pays half and anything below pays none. The site panel says so before you attack. Raids take a share of material resources; War Bonds are not raided.
Protected raid reserve
Every base permanently protects up to 1,000 of each material plus 10% of its completed Warehouse capacity. Warehouse level 4 protects 3,000 of each material. A raid can take at most 25% of your stock and cannot take this reserve. The reserve protects existing stock; it does not refill spent resources. You can spend protected materials normally. VIP and officer bonuses do not increase the reserve. Scouts and battle forecasts exclude protected stock from available loot; older reports may still show an earlier estimate.
Letters and diplomacy
Select a known player base to open its commander card, then choose Diplomacy. The letter icon holds offers and important notices. Resource trades show both sides before acceptance; neither side reserves stock, and the whole trade succeeds together or nothing changes. Direct offers and the public market share limits. Friendship and alliance membership prevent hostile orders. Ending a friendship gives 24 hours of notice; leaving an alliance protects former allies for 48 hours.
War, peace and approval
A war declaration gives 12 hours of mobilization before attacks open. After 48 active hours, the defender can end the war and either side can offer peace. War ends automatically after seven active days. The attacker can withdraw during mobilization. Every ending grants seven days of truce. Only one outgoing war is allowed at a time, with at least 72 hours between declarations. Allies cannot declare war on each other. Defensive weariness begins only after the first battle. War weariness gradually lowers approval: up to 20 points for offensive war, eight for defensive war and 25 combined. Overlapping wars do not add their rates. Peace lets remaining weariness recover by four points a day, including offline. Bases without civic administration lose up to 6.25% of material output while war weariness lasts.
Scouts and restricted areas
Scouting can be detected and reported to the owner without starting a war. Friends and allies cannot be scouted. A restricted area is a demand drawn on the world map: up to 5 by 5 fields within 9 of the sender's base, never over the recipient's home area, with 12 hours to react and a 72-hour expiry. The recipient sees the red area on the map and may accept the demand, reject it or propose one other area. New convoys sent into it after the response time are recorded as violations in a grouped letter; a demand never blocks access or starts a war automatically. Repeated scouts, demands and optional letters have shared limits and cooldowns.
Choose PvP deliberately
Player attacks require an active declared war. Both bases must have HQ level 4 or higher and be within 2 HQ levels of each other. Against a lower HQ, your army is limited to the smaller of your own deployment capacity and 125% of the target capacity. Wait at least 30 minutes between raids on the same rival. Losing a defensive PvP battle grants a free 1-hour shield. When base recovery is available, this becomes 8 hours once per rolling 24 hours, otherwise 1 hour; defeats can then damage the Defense Tower and Barracks. Tower defense is reduced by 20%, and new Infantry training takes 25% longer. One free crew repairs the tower in 1 hour and Barracks in 2 hours, one after the other, including offline. Levels and production stay intact. Active damage never stacks or restarts. An optional 200 Supplies + 100 Steel delivery removes up to 30 minutes once per repair; repairs never extend protection. Follow-up attacks that arrive during protection return without losses or loot. New PvP attacks take at least two minutes to reach their target, even with officer speed bonuses. Incoming attacks appear above every game screen. Launching an offensive PvP march removes your own shield immediately, including recovery protection. PvE attacks and scouting do not remove your own shield. A protected target cannot be attacked; a shield is checked again on arrival.
Boss campaign: Break the command
After claiming Break the blockade, reach HQ 4 to challenge the artillery-heavy Iron Viper Battery. Claim its first-victory bounty to unlock the armored Steel Jackal Column at HQ 6, then Black Citadel's mixed army at HQ 9. At HQ 14, counter Ash Legion's veteran infantry. At HQ 16, capture Iron Bastion Armorworks with its heavy armor; at HQ 18, silence the artillery-heavy Storm Battery Ridge. These two stockpiles help fund your development and replacement troops. At HQ 20, defeat Obsidian High Command to complete the liberation campaign. Black Citadel, Ash Legion, Iron Bastion and Obsidian High Command are fortified: Combat Engineers and Assault Guns help break their towers. Each encounter requires the preceding bounty. Locate them in the World Map's Boss Campaign, scout and use the same formation forecast as ordinary PvE. Improve Radar and recon research if your intelligence is not exact. Bounties are permanent, awarded once and claimed in Missions. Each commander fights bosses independently. After your victory, that site rebuilds for you for 6 hours. Another commander's victory does not block your army. These encounters preserve your base shield and have no daily deadline or purchase requirement.
Defend while your army is away
Troops on a march do not defend your home base. Defense Towers fire from round 1 and must be silenced before an attacker can win, even when no garrison is home. Train reserves, upgrade defense research and review incoming attack warnings. The slowest selected troop sets march speed, and at most three marches can be active together.
Field operations between bosses
Repeatable camps now cover every level from 1 to 16. Ordinary patrols fill levels 4, 6, 7, 9, 11, 12, 14 and 15 with rifle, armor and gun formations; these rebuild for you for 2 hours. Veteran operations remain at levels 10, 13 and 16 with a 6-hour personal rebuild: the Veteran Infantry Line, Armored Reserve Depot and Forward Siege Battery. Armor counters infantry, artillery counters armor, and infantry counters guns, but supporting troops change the full forecast. Nearby operations recommends a tier below your HQ, up to level 16, unless your campaign order needs another target. From HQ 5, normal camps up to two levels above HQ are also available as optional challenges. Lower the filter for easier choices, scout and compare carried materials with replacement costs; winning does not guarantee profit. Other commanders fight independently. These operations preserve your shield and grant cargo on return without repeating boss bounties.
Your first orders are waiting.
Build a foothold and start the Frontier Campaign at your own pace.